
15 Best Anime Final Battles, Ranked
Big finales are where stories cash in on all the build up. The last clash usually pulls every thread together, brings rivalries to a head, and shows what the characters actually learned. These endings stick because they resolve big questions while giving fans the kind of set piece that defines an entire series.
Here are fifteen anime final battles that close the curtain with clear stakes, concrete consequences, and memorable settings. Each one ties back to the themes of its show and pays off earlier setups, with a quick note on the studio behind the animation for helpful context.
15. Mugen and Jin vs Kariya Kagetoki in ‘Samurai Champloo’
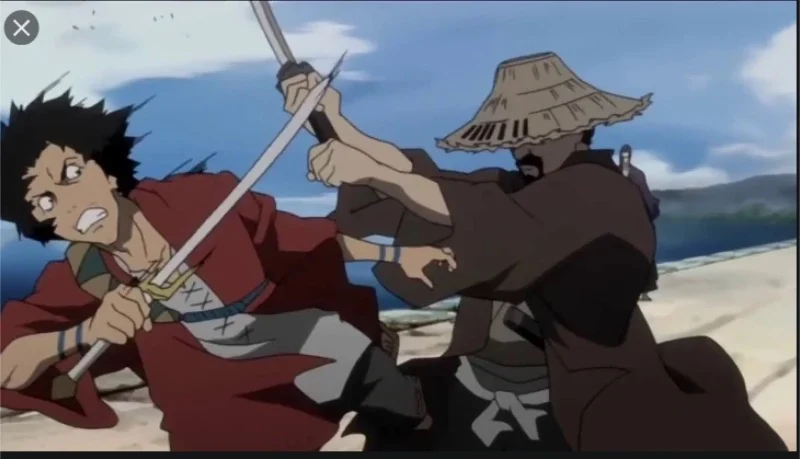
The showdown takes place in an abandoned church as Mugen and Jin face Kariya Kagetoki while Fuu searches for the Sunflower Samurai. The fight’s structure keeps the action grounded in sword forms and footwork, showing how Mugen’s unpredictable style and Jin’s disciplined iaido deal with Kariya’s precision. The aftermath splits the trio and completes Fuu’s personal journey. This finale was produced by Manglobe, which leans on sharp cuts and rhythmic editing to sell each exchange.
The battle caps the hunt that started with a single promise and follows the road diaries format to a final destination. Environmental details like broken pews and narrow aisles shape how each fighter enters and disengages, and the injuries that carry over from earlier episodes affect timing and stamina. The duel also reinforces the series’ rule that every decisive strike comes from setup rather than raw speed.
14. Vash vs Knives in ‘Trigun’
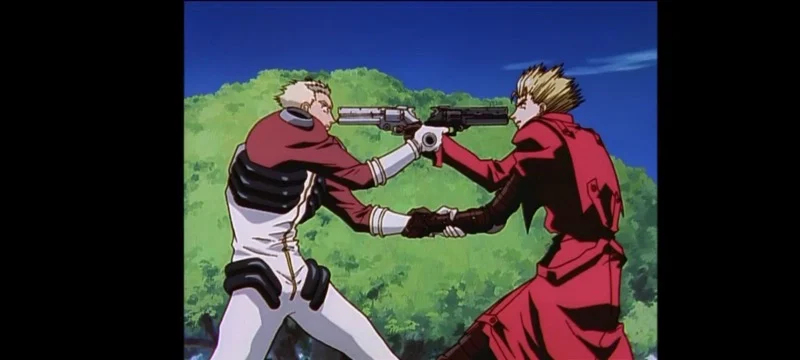
Vash confronts Knives in the city ruins after preventing mass casualties, and their duel uses revolvers, Plant energy, and the Angel Arm as a threat more than a constant effect. The fight is arranged around limited ammunition, distance control, and knifework that forces Vash to switch grips and alter his stance. Madhouse animated the series, and the finale uses stark backgrounds and long holds to let muzzle flashes and debris read clearly.
The encounter resolves the mystery of the twins’ origin and the ethical lines around Plant technology. The conclusion sets terms for how survivors rebuild and what the Bernadelli Insurance duo records about the event. The city layout matters for sightlines and ricochet angles, which explains why certain shots are intentionally suppressed and others are risked.
13. Kirito vs Heathcliff in ‘Sword Art Online’
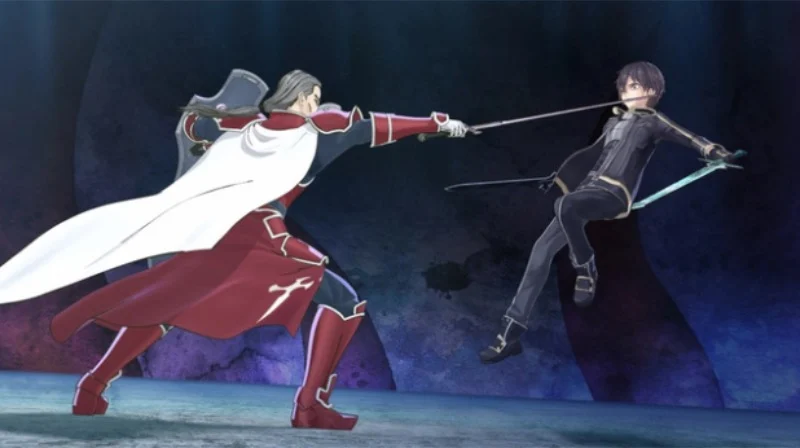
Kirito challenges Heathcliff on the 75th floor after uncovering Kayaba’s identity, which changes the win condition from floor clearing to a single duel with permanent consequences. The mechanics of sword skills, weapon durability, and latency windows decide the exchanges, and the system’s hidden invincibility flag forces Kirito to adapt mid fight. A-1 Pictures staged the scene with readable hit sparks and health bar framing that matches the in world UI.
The result frees trapped players and resets server rules, and it explains how admin privileges can bend timing and collision detection during burst attacks. The duel also clarifies why certain guild formations collapsed once leadership was compromised, and it confirms the limits of anti cheat protocols inside the castle’s instance.
12. Shinichi vs Gotou in ‘Parasyte: The Maxim’
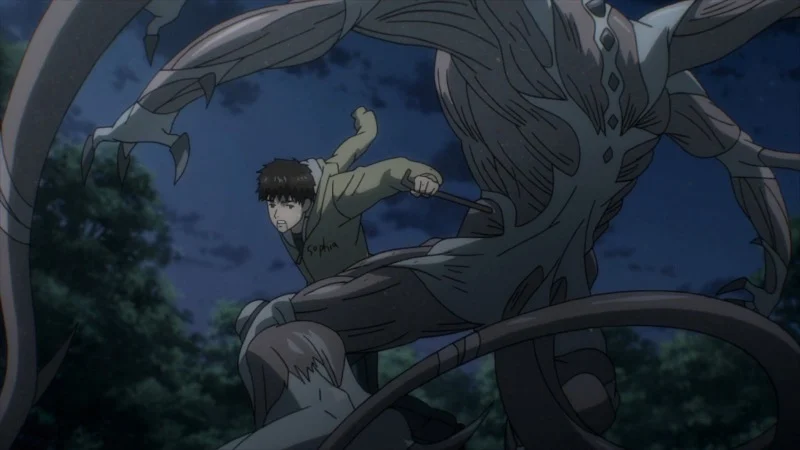
Shinichi faces Gotou at the waste treatment site after tracking his movement patterns and confirming weakness to toxins. The fight uses terrain, temperature, and exposure to industrial chemicals to break Gotou’s regeneration cycle. Madhouse uses close ups on tendril reconfiguration and pauses between forms to mark when the parasite mass reallocates.
The resolution establishes a medical explanation for Gotou’s failure to reassemble and ties back to earlier samples collected from parasite hosts. The outcome provides law enforcement with a containment approach and closes the case files on city wide incidents. The location also shows why civilian evacuation routes were planned around that facility.
11. Akame vs Esdeath in ‘Akame ga Kill!’
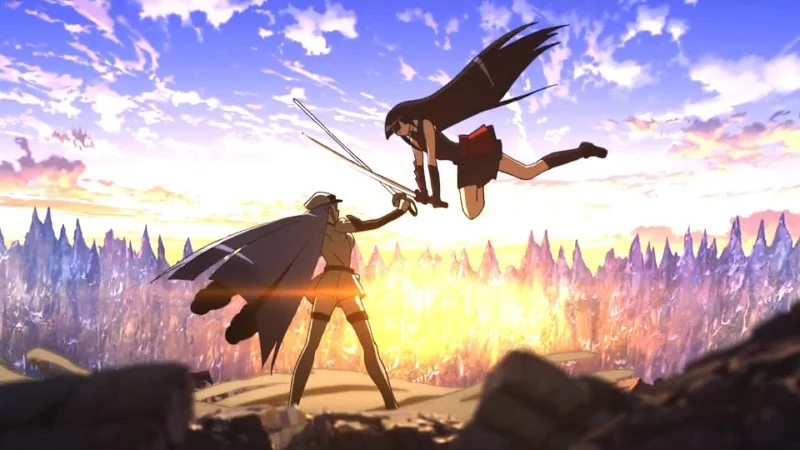
Akame engages Esdeath in the capital’s frozen arena after Night Raid’s final operation fractures the regime. The fight turns on Teigu properties, with Murasame’s curse condition and Esdeath’s time stop both deployed around clear activation cues. White Fox animates the flow so each ability has fixed limits, showing how Akame staggers her movement to avoid direct freezes.
The conclusion redraws the political map and documents which units are dissolved and which territories accept provisional governance. The scene lists casualties and confirms how Teigu become untraceable or unusable after the clash, which prevents later power grabs. The city’s architecture determines movement lanes and explains the choke points both combatants choose.
10. Yusuke vs Yomi in ‘Yu Yu Hakusho’
Yusuke and Yomi meet in the Demon World Tournament finals, where rules force a clean fight without external interference. The match uses stamina tracking, sensory deprivation experience on Yomi’s side, and Yusuke’s training arc metrics to set round pacing. Studio Pierrot keeps the camera locked to ring boundaries, which makes every out of bounds recovery part of the scoring logic.
The outcome decides leadership in the Demon World and triggers reforms that reduce large scale invasions. The bracket format clarifies why certain fighters are eliminated earlier and how seeding shaped the path to the final. The broadcast within the story also documents official time stamps and judges’ calls for record keeping.
9. Ryuko and Satsuki vs Ragyo in ‘Kill la Kill’

Ryuko and Satsuki coordinate on the Honnouji satellite platform to cut Ragyo off from the Life Fiber network. The plan tracks fiber link density, suit synchronization, and Goku Uniform output, with each burst timed to create openings for thread cuts. Trigger animates suit states with clear visual flags so viewers can follow when synchronization is stable or failing.
The aftermath severs transmission to Earth and initiates a recovery protocol for students and staff. The fight logs which Kamui parts remain intact and how non combatants assist with trajectory corrections. The finale also explains how school infrastructure doubled as a launch system and why certain modules survive reentry.
8. The Black Knights vs Damocles in ‘Code Geass: Lelouch of the Rebellion R2’
The final conflict centers on the Damocles fortress and the FLEIJA warhead control system. Lelouch maneuvers political units while Suzaku in the Lancelot Albion handles interception and penetration tasks. Sunrise maps each Geass command and its chain of custody so orders and counterorders can be traced to their targets.
The conclusion shuts down the FLEIJA trigger and consolidates authority under a planned transfer that ends open conflict. The sequence documents which Knightmare Frames are destroyed and how the fortress’ shield nodes are disabled. The result establishes a new governance structure and records the exact moment public perception turns during the parade.
7. Asuka and Unit 02 vs the Mass Production Evangelions in ‘The End of Evangelion’
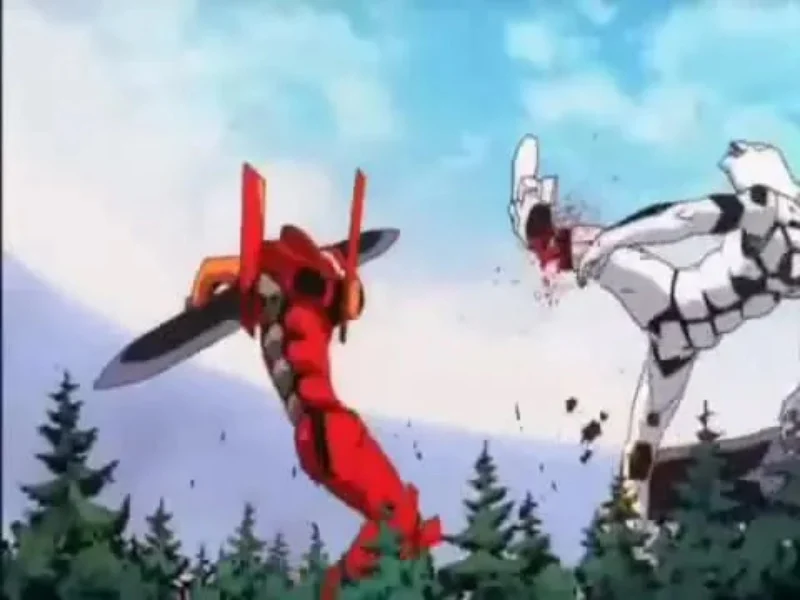
Asuka defends the fleet against nine Mass Production EVAs while Shinji’s decisions lead into Instrumentality. The battle tracks progressive knife usage, power limitations, and aerial combat that forces Unit 02 to conserve energy until the external battery runs dry. Gainax and Production I.G combine cel work with live action plates and 3D elements so weapon arcs and flight paths remain legible.
The sequence details how dummy plugs override pilot inputs and how the Spear replicas pierce AT Fields under specific conditions. The aftermath feeds directly into Third Impact, with documented impact sites and casualty counts across the bay. The film’s reports within the story archive lab notes on synchronization thresholds and failure modes.
6. Mob vs Himself in ‘Mob Psycho 100’

Shigeo loses conscious control and becomes the source of the disaster, which reframes the final battle as a struggle to reconcile halves of the same person. The conflict uses familiar city blocks to mark the route of destruction, while friends attempt interventions at known emotional anchors. Bones animates energy surges as discrete pulses so the escalation can be measured scene by scene.
The resolution confirms the role of social support in stabilizing Mob’s powers and explains why earlier coping strategies were insufficient once stressors aligned. The city’s infrastructure reports document outages, transit disruptions, and evacuation corridors that reflect the path of the event. The conclusion logs the conditions under which Mob regains agency.
5. The United Forces vs Father in ‘Fullmetal Alchemist: Brotherhood’

The last fight occurs at Central as Father tries to contain the power he stole. The battlefield divides into teams focusing on alchemy disruption, sniper cover, and containment circles, while Hohenheim’s counter array changes the flow mid engagement. Bones stages transmutation effects with consistent rules so every reversal has a visible trigger.
The end of the clash restores the flow of alchemy to normal parameters and records arrests of key military figures tied to the plot. The resolution itemizes which Philosopher’s Stones are depleted and which individuals regain what was taken. The citywide diagram explains why certain streets collapse and others remain intact.
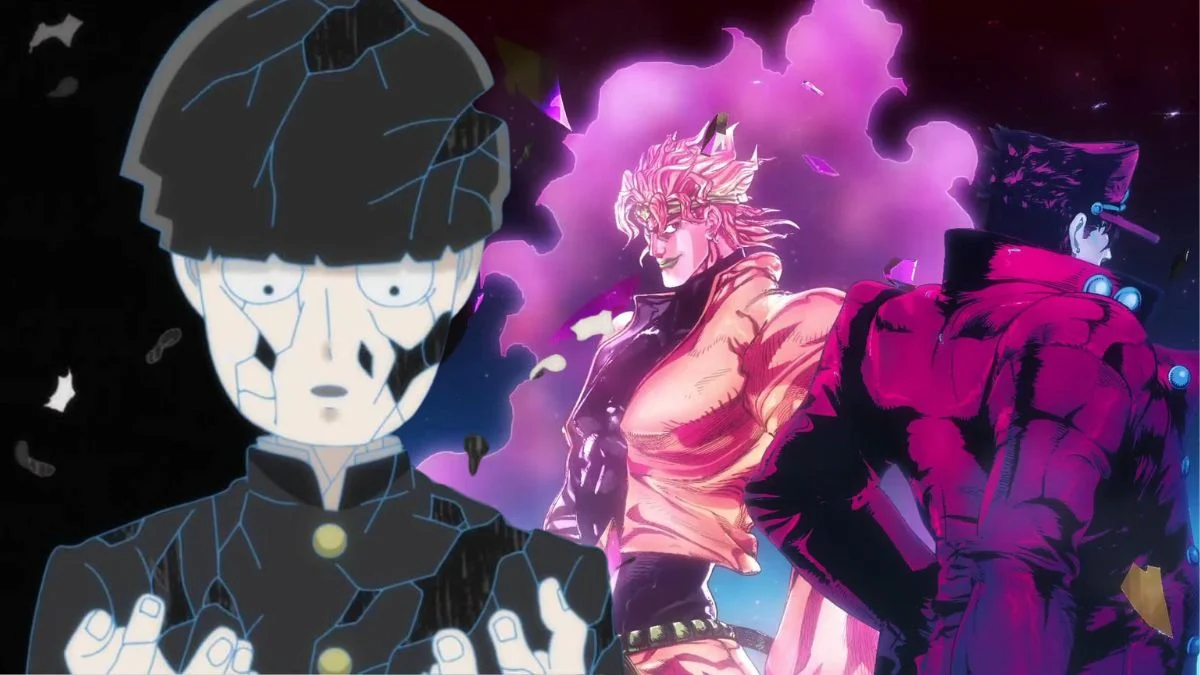
4. Jotaro vs DIO in ‘JoJo’s Bizarre Adventure: Stardust Crusaders’
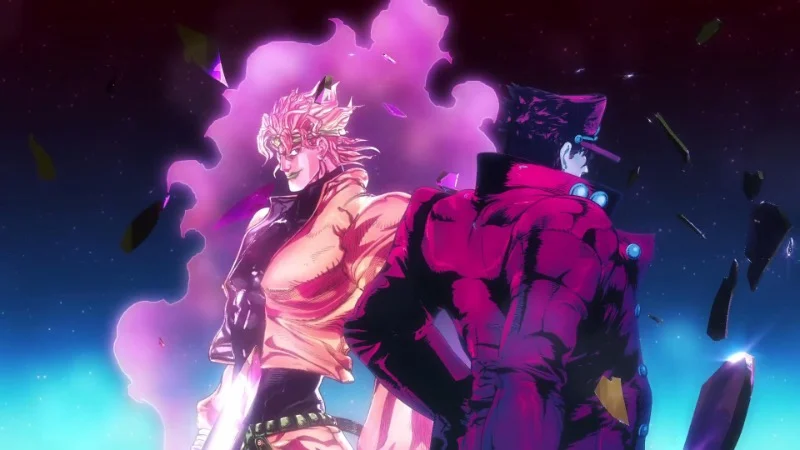
Jotaro faces DIO in Cairo with The World and Star Platinum trading time stop advantages. The fight explains the limits on duration, cooldown, and precision when stopping time, and it shows how heartbeats and breath control interact with those limits. David Production makes each Stand action distinct so tracking speed and reach is straightforward.
The outcome ends the threat to the Joestar line and includes a medical explanation for blood transfer effects during the encounter. The route through the city records each collision and why specific vehicles become hazards. The diary pages collected afterward document Stand behavior for future reference.
3. Team Dai Gurren vs the Anti Spiral in ‘Tengen Toppa Gurren Lagann’
The final battle moves into a cosmic scale where probability manipulation and spiral power output determine the shape of the fight. The formation changes as the team shifts between mecha configurations, with each merge affecting weapon range and defensive capacity. Gainax presents size transitions in clear steps so the viewer can follow the logic from ship to galaxy level forms.
The conclusion breaks the Anti Spiral’s imprisonment model and establishes new travel parameters for humanity. Telemetry captured during the fight is archived to explain how spiral power amplifies under collective resolve. The epilogue logs the new government framework and the launch schedule for migration fleets.
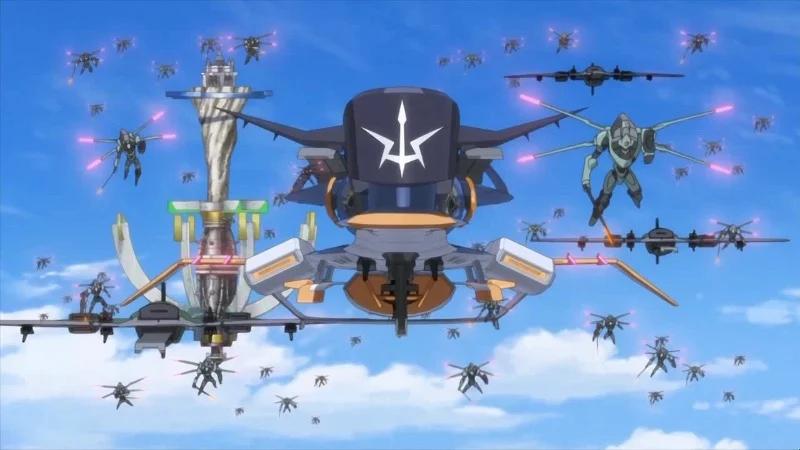
2. The Alliance vs Eren on the Founding Titan in ‘Attack on Titan’
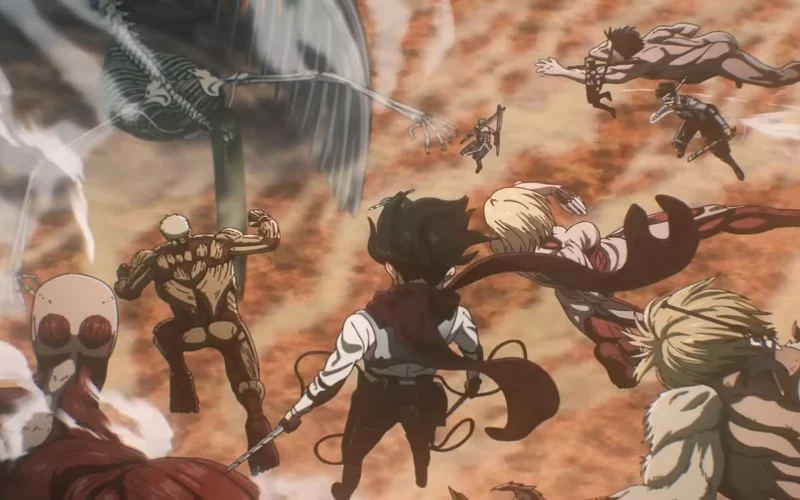
The Alliance boards the Founding Titan during the Rumbling, splitting roles between airborne insertion, ground evacuation, and Titan neutralization. ODM gear limitations at high speed and the need to protect the flying boat define the opening moves, while the injection plan requires exact positioning. MAPPA animates the scale shift from city level destruction to body wide traversal so navigation remains clear.
The outcome stops the Rumbling and catalogs the surviving population with follow up reports on territorial borders. The battle file lists the Titans neutralized and the precise sequence of transformations. The ending sets legal precedents for post war trials and explains the new communications protocols between former enemies.
1. Naruto vs Sasuke at the Valley of the End in ‘Naruto Shippuden’

Naruto and Sasuke return to the Valley of the End and fight through ninjutsu exchanges that escalate from clones and counters to bijuu and Susanoo forms. The battlefield statues and riverbed shape movement, while chakra reserves and hand seal timing decide which techniques land. Studio Pierrot keeps each transformation readable so substitutions and feints can be followed without confusion.
The conclusion closes the long running conflict between Leaf leadership and Uchiha grievances and explains the political settlement that follows. Medical teams log injuries consistent with exhausted chakra networks, and the village records document the terms that end the wider war. The site remains a landmark for future missions and memorials.
Share your pick for the best anime final battle in the comments so everyone can compare notes.


